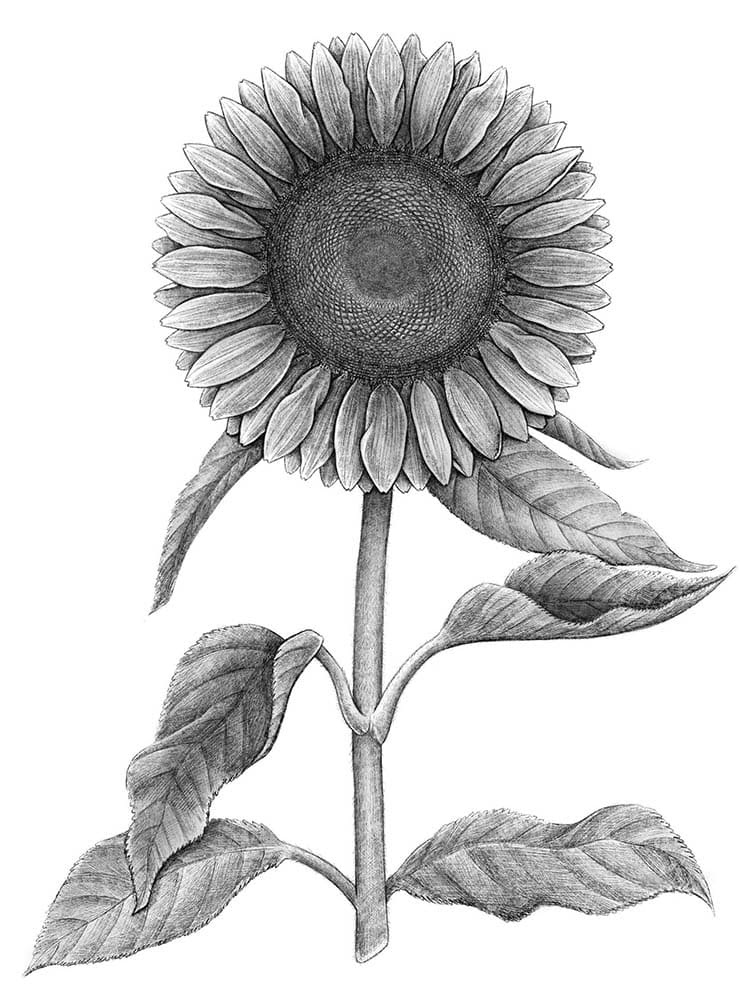
Sunflowers are such radiant and beautiful flowers, they’re just asking to be drawn!
In this easy step by step tutorial, I’ll show you how to draw a sunflower using Procreate.
This tutorial can be followed even if you don’t have Procreate, so feel free to follow along!
Let’s have a quick overview of what we’re going to cover in this tutorial -
- Tools needed
- How to draw a sunflower - step by step tutorial
- How to draw a sunflower from the side - bonus tutorial
- Extra tips.
- Final words
Without any further delays, let’s get straight to it!
Pin me!

Tools needed for this tutorial
For this tutorial I’ll be using:
- iPad Pro
- Apple pencil
- Procreate App 5X Version
I’ll also be using my set of Graphite and Charcoal brushes for Procreate, however you can use any brushes you like.
If you would like to try out these brushes, here’s a free sample for you.
I’ll be using this image as my reference.

Let’s get started!
How to draw a sunflower - step by step tutorial

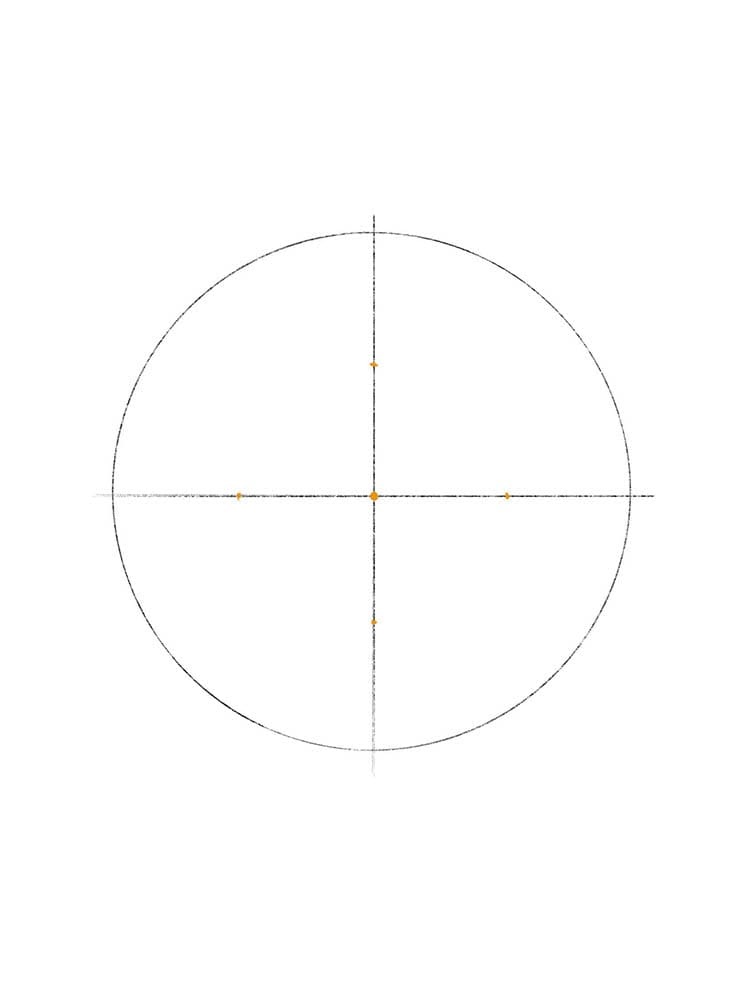
Step 1 - Create a Canvas and draw a circle
Let’s begin by creating a canvas in Procreate.

I’ll use a screen size canvas.

Once your canvas is created, let’s draw a circle.
Loosely draw a circle and don’t lift your Apple Pencil from the screen.
After a few seconds, the circle will become smooth.
Without lifting the Apple pencil, touch the screen with your finger.

This will allow you to create a perfect circle!
For the whole sketch I used the "trusty pencil" from the graphite and charcoal set of brushes.
Step 2 - Find the center point
Create a new layer.

Loosely draw a vertical line at the center of the circle.
Like you did on the last step, don’t lift up your apple pencil and after a few seconds the line will become straight.
Still without lifting your apple pencil, touch the screen with your finger.

And there you have a perfectly straight vertical line.
If you feel like this line is not at the center of the circle, use the cursor tool and move it until you are happy with where the line is.
Once you’re satisfied, duplicate the layer where the vertical line is by swiping left on top of the later and clicking on the “duplicate” button.
Now use the cursor tool with the magnetics turned on to rotate the line and make it into a horizontal line.

The point where these two lines meet is the center point of the circle.

Step 3 - Draw a second circle
Make a new layer.

Find the middle point between the center point and the circle on all the lines that make up the cross.

Once you mark these points, connect them with curvy lines to make a new circle inside the old one.

Step 4 - Divide the second circle
Make a new layer.
Now, let’s divide the second circle in thirds.

Using the lines that make up the cross as a reference, find the thirds and mark them.
Connect the mark you made with curved lines to draw two concentric circles inside the second circle.

Step 5 - Merge it like it’s hot
Merge all the layers you’ve created so far to finish your basic sunflower sketch!

Rename this new layer “Sketch”

Step 6 - Let’s begin to make it look more like a flower!
Start to create arrows that go out of the center point to help you mark the angles for the petals.

Make a new layer.
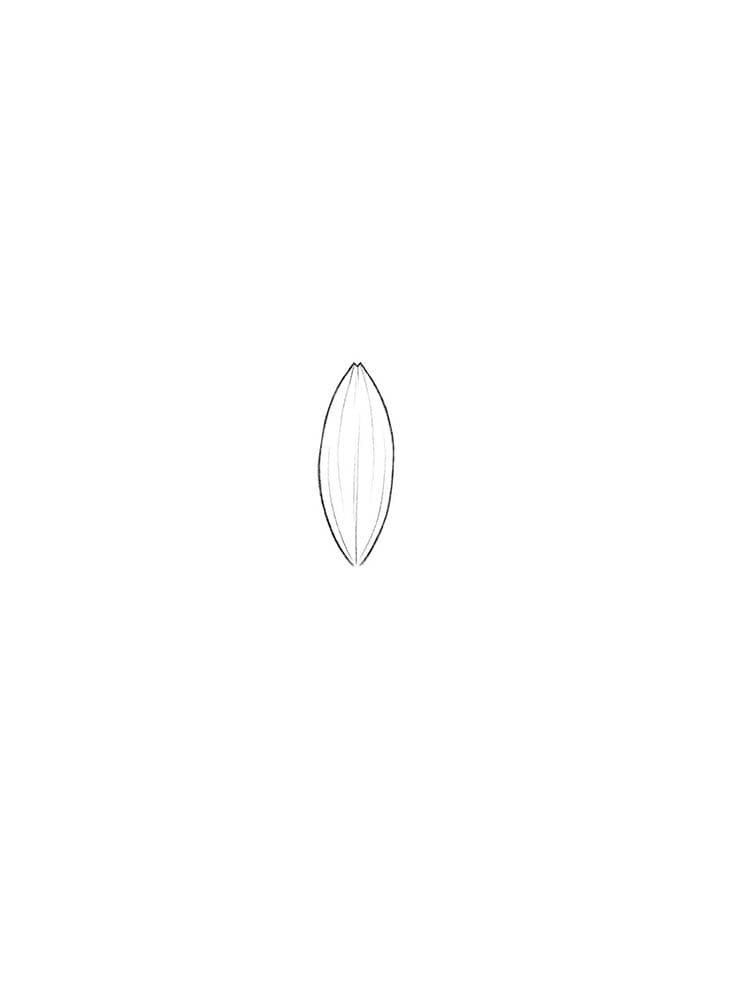
Start drawing petals using the point where the second circle and the arrows you just created meet.

Extra tip: To make them look more like sunflower petals, draw a tiny capital “M” at the tip.

Step 7 - More petals
On the layer where you just drew, create two petals behind each side of the first petals you created.

Repeat this with every one of the first petals you created.

Step 8 - And more petals for the back row!
If you see that there’s still some places where you can add a petal in the front, go ahead and do that!

Add some extra petal tips in the back to the places where they’re missing.

Step 9 - Add some flappy folds.
Petals don’t have smooth surfaces, they have folds.

To make the foldy flaps, draw a soft line that goes from the side where the petal and the second circle meet that doesn't reach the tip of the.

Add some extra folds on each side of the line you just created alternating the directions of the lines.
Make sure to make soft lines that don’t go completely from one side to the other.
Step 10 - Add some imperfections.
To make your illustration seem some realistic, let's add some organic imperfections to your sunflower.
The petals of a flower are not perfect, they twist, break and fold.
There’s different kinds of imperfections you can create.
You can make the petals fold to the back like this.

Or have the petals fold frontward.

You can also create small breaks in the tips of the petals.

Add these imperfections to some of the petals.

Step 11 - What about the center of my sunflower?
Let’s start working on the center part of your sunflower.

Create a new layer.

We’ll begin with the first section of the center.

Start drawing small circles on the outside of this first section.

The closer you get to the center, the bigger the circles will get.

Extra Tip: For the bigger circles on this part, lay them out like they’re bricks. This will help you make your illustration seem more natural.
Step 12 - Second section of the center.
Make a new layer.
Let's continue with the second section of the center of your sunflower.

In this section, start drawing curved lines towards one side.

Now do the same but with curved lines towards the other side.

This way you’ll create some sort of web.
Make a new layer.
Start defining the shapes that you see inside the web.

Define all these shapes to start with the final section of the center.

Step 13 - Final section of the center.
Make a new layer.
Start drawing small “U” shapes that are all pointing towards the center point.

Make each row of “U” shapes smaller than the last.
Continue to do this until you’re done with the center.

After you’re done with this, you can turn off the “sketch” layer.

Step 14 - Let’s give that flower a stem!
I think one of the prettiest things about sunflowers is the way the leaves and the flowers look together, so let’s add some to our illustration.
I’ll use this image as a reference for the stem and leaves.

Create a new layer.

Draw two lines going out from the bottom part of the sunflower.

Notice that in the reference image, the stem also goes on the sides to form some leaves.
Let’s add that as well.

Step 15 - Add leaves to your sunflower drawing.
Following the reference, draw some leaves.

They don’t need to be exactly the same since no flower is equal to another.
Just have fun and don’t think about it being exactly the same as in the reference.
When you’re done with the shapes, add some veining to the leaves and small spikes on the edges.

Step 16 - Final touches.
Add some small hairs on the stem of your sunflower illustration using delicate, short lines.
Let’s also add some extra details to the edges of the center of your flower.
Create small shapes that sort of resemble a small ”i” to add some extra detail to your drawing.

To finish, add texture to the center of your sunflower by adding some dots inside the circles that are in the center.

With this, your drawing is done!
Now, let’s add some shadows and light!
Step 17 - Add shadows.
Let’s add some life to your illustration.
Make a new layer.

With a soft brush, start to add shadows to your flower in the areas where it needs it.

Continue to add shadows until you’re happy with how your drawing is looking.
Step 18 - Add some light.
Using the eraser tool with the same brush you just used to make the shadows, clean up a bit in the areas where you see more light in your reference image.

Step 19 - Define your sunflower illustration.
Add some extra dark areas to make your drawing pop more!

Continue to add shadows and lights until you’re happy with how your drawing is looking.
And there you have your sunflower drawing!

Step 20 - Want to add some color?
I know I do :D
You can download the color palette I used for this illustration here.
Merge down all the layers we’ve created so far.
Rename this layer “Sunflower Drawing”

Create a new layer, name it “Base Color” and move it under the sunflower drawing layer.
Use the selection tool with the freehand turned on.
Select your sunflower.

Don’t worry about making a perfect selection, we can fix that later.
With the selection still on, make sure you’re on the base color layer you created and not on the sunflower drawing.

Select a medium yellow from the color palette and drag and drop it into the selection to create your base color.
Using the selection tool, erase the areas where there shouldn’t be any color.

Step 21 - Define all the base colors.
Click on the layer you just created and press select.

This will allow you to add color without going out of the selection you just created.
Now, pick a medium orange/tan color to make the base color of the center.
And a light green for the stem and leaves.

Step 22 - Add color shadows.
Make a new layer.
Keep the base color layer still selected and in the new layer, start adding colors with darker values in the areas where the drawing has shadows.
Continue to do this until you’re happy with how your drawing is looking.

Step 23 - Add light and define the colors.
Still having the base color layer selected, create a new layer.
Use some of the lighter colors in the color palette to add some light to the areas of your drawing that have the most light.

Continue to add dark and lighter colors until you’re satisfied with your sunflower illustration.
To finish, make a new layer and place it on top of the sunflower drawing.
On this layer, add some extra highlights to make your illustration come to life!

Congratulations! You just finished your sunflower drawing!
How to draw a sunflower from the side - bonus tutorial

But what if I want to draw a sunflower from the side?
Not to worry, here’s an extra tutorial for you!
Step 1 - Build the sketch
Let’s begin by creating an oval shape that is slightly slanted.

Now, inside that shape, let’s make another oval shape that is smaller than the first.

Make this second shape closer to one side than to the other.
Inside this second shape, create an even smaller oval shape that touches the edge of the side that is closer to the biggest oval shape.

After this, draw two lines that connect the second oval shape with the first.

Now, on the outside of the first oval shape, create a “C” like shape.

To finish your sketch, let’s add a curved line that marks where the stem of your sunflower drawing will be.

And there you have the sketch for your sunflower from the side!
Pretty easy, right? ;)
Rename this layer “sketch” to keep everything organised.
Step 2 - Define the stem and where it connects to your sunflower.
Let’s begin to make this look more like a sunflower!
Create a new layer.
Draw two lines surrounding the line of the sketch that makes up the stem of your sunflower.

After this, start drawing shapes that slightly resemble curly fangs to make up the first row of the sepal (the sepal is the area where the stem and the flower meet)

For the row of the sepal that is closer to the sunflower, draw shapes that look like a thick “V”.

When you’re done with those shapes, make small lines connecting the first and second row of the sepal.

Step 3 - It’s time for the petals.
Make a new layer.

Use the sketch to start drawing arrows that will help you determine the direction of your petals.
The row of petals that is closer to the sepal should come out from the first big oval shape you made at the beginning.

And the row of petals that is farther from you should come out from the second oval shape you drew to make up the sketch.

Once you have the guides done, it’s time to make a new layer!
Start drawing petals the same way we drew them on the last tutorial and using the arrow to mark the center of them.

Step 4 - More petals!
Add some extra petals behind each side of the ones you created before.

For the ones that are closer to you, draw a soft triangular shape with two lines from the sides.

Continue to add all the petals you need!

Step 5 - Add folds and imperfections on the petals.
Just like we did on the previous tutorial, let’s add some flappy folds to our sunflower petals.
Remember petals don’t have a smooth surface, they have folds and imperfections.

Step 6 - Draw the center of your sunflower.
Make a new layer.
Start drawing small circles close together to create the center of your flower illustration.

Keep adding small circles until you are happy with how it’s looking.
Once you’re done, turn off the sketch layer.

And your sunflower drawing from the side it’s done!
Step 7 - Shadows, light and definition!
Let’s add some shadows and life to the illustration.
On a new layer, start adding soft shadows to your drawing.

Do this all over your sunflower.
Next, use the same brush you used to make the shadows as an eraser and start deleting in the areas where there should be more light.

Continue to alternate between these two things to define your drawing!

Step 8 - Let’s add some color.
Let’s use the same technique we used to color in the previous tutorial.
Merge down all the layers we’ve created until now and rename this new layer “Sunflower Drawing”.
Create a new layer and place it underneath the sunflower drawing.
Use the selection tool with the freehand turned on to make a selection of your sunflower drawing.

Drag and drop a base color on the newest layer you created.

Now, let’s add all the other base colors for your drawing.
Click on the base color layer and press “Select”
This will allow you to add color without going out of the areas where you want the color to be in.
Use a light brown for the center of the sunflower and a light green for the stem and the sepal.

Step 9 - Add color shadows and light.
Create a new layer and with the select tool still on, start adding darker versions of the colors you just used in the areas where the sunflower drawing has more shadows.

Once you’re done with this, do the same with lighter colors in the areas where your sunflower drawing has lighter areas.

Continue to do this until you’re happy with how it’s looking.
To finish up, create a new layer and place it on top of the sunflower drawing to add some final shine spots with a lighter color.

And there you have it!
A sunflower illustration from the side :D
Extra tips
Something that works great for me when I’m drawing any flower is to keep several reference images of that flower close by.

This is only to get a proper idea of how the flower looks, how the petals behave, which colors to use.
However, don’t get too carried away trying to make your flower illustration look exactly the same as the reference image.
Each flower is unique, so there’s no point in trying to copy everything exactly as it is from a reference image.
Just have fun when you’re drawing and try to not get too caught up in the details ;D
Final words
Well, that’s it for today folks!
I hope you found these tutorials helpful and fun to follow.

I would love to hear from you, what other tutorials would you like me to make for you?
Let me know by dropping a comment below!
Thank you for reading and until next time!


.png)